Welcome to GoBozor

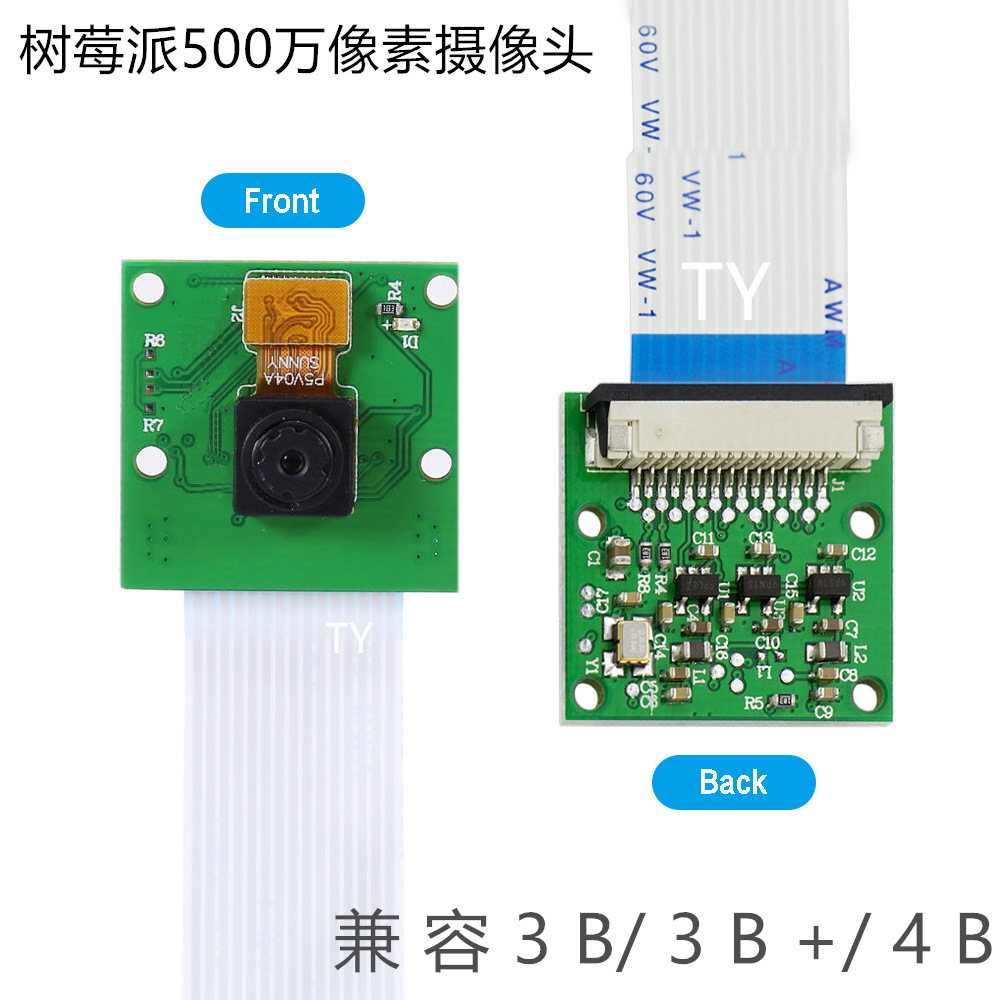
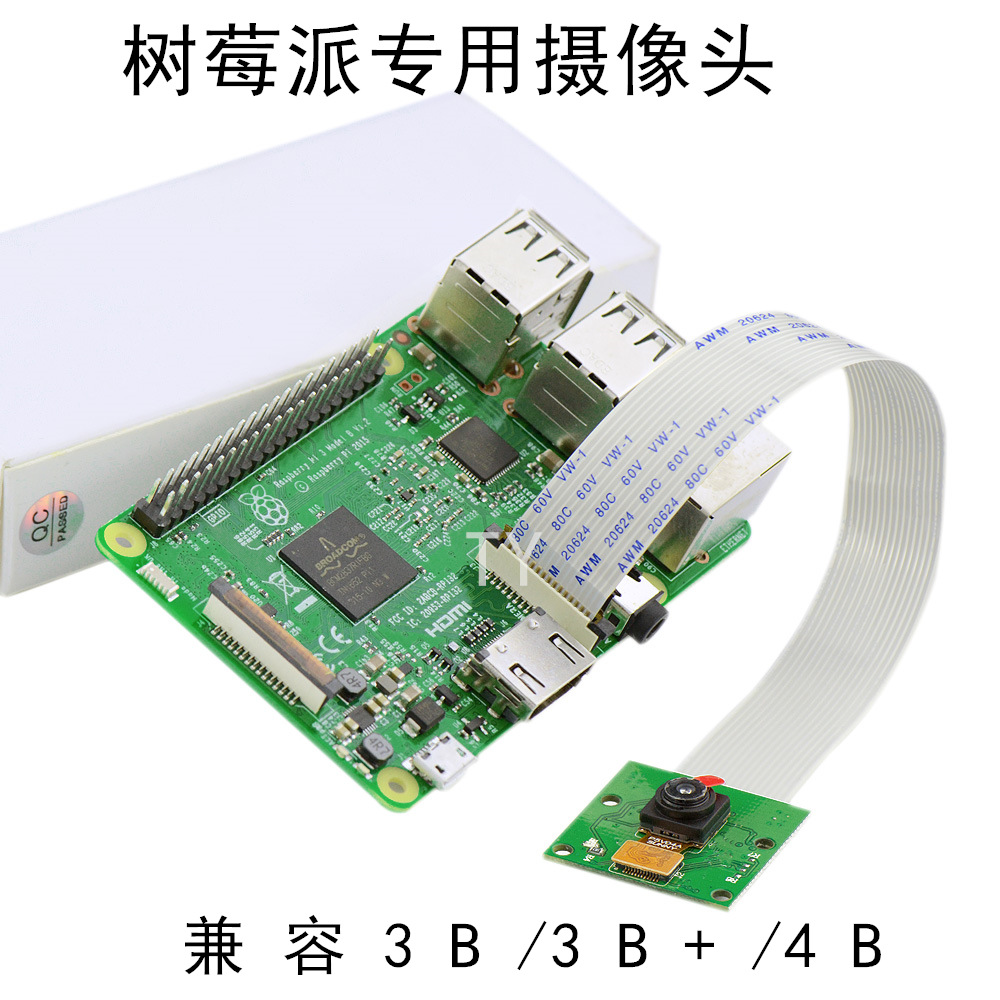


Applicable to RASPBERRY PI CAMERA module RASPBERRY PI 5 million pixel RPI CAMERA
Price section
Price from:
64,889 so'm
Color
Green
Guaranteed delivery time
If we are 45 days late, you will receive your order for free. More details
Always in touch with you
We will answer any questions every day.
Secure payment in a convenient way
We will accept payment by any card
BNPL available
About the product
Characteristic
- OEM
Non-OEM
- Material
PCB
- Origin
Shenzhen
- Product category
HD camera
- Color
Brand New
- Sensor Type
CMOS
- Sensor pixel
5 million
- Item No.
123456
- Processing mode
Custom Images
- Printed LOGO
OK
- Interface
IEEE 1394
- Brand
5647
- Scope of use
177798652
- Model
5647 chip
- Maximum resolution
1600x1200
- Product Weight
1
- Time to Market
2020
- Maximum resolution
1280X960
- Frame rate
120fps
- Gift-giving purposes
W
- Product Type
Brand New
- After-sales service
Shop three packs
- Do you need to drive
Drive-free
- SOURCE category
In stock
- Customized processing
Yes
- Support one-piece delivery
Support
- Invoice
Provide invoice
- System support
Support
- Packing List
None
- Focusing mode
Autofocus
- Photosensitive element type
CMOS
- Patent source or not
No
- Have authorized private brands
No
Description
以下是详细说明
How to enable camera support in Raspbian
Boot up the Pi and log in. The default username is pi, and the default password is raspberry. (Note: if you have changed these from the default then you will need to supply your own user/password details).
Run the following commands in a terminal to upgrade the Raspberry Pi firmware to the latest version:
sudo apt-get update
Click to enlarge
sudo apt-get upgrade
Click to enlarge
Access the configuration settings for the Pi by running the following command:
sudo raspi-config
Navigate to “camera” and select “enable”.
Click to enlarge
Click to enlarge
Select “Finish” and reboot.
Click to enlarge
How to use the Raspberry Pi camera software
raspivid is a command line application that allows you to capture video with the camera module, while the applicationraspistill allows you to capture images.
-o or –output specifies the output filename and -t or –timeout specifies the amount of time that the preview will be displayed in milliseconds. Note that this set to 5s by default and that raspistill will capture the final frame of the preview period.
-d or –demo runs the demo mode that will cycle through the various image effects that are available.
Example commands
Capture an image in jpeg format:
raspistill -o image.jpg
Capture a 5s video in h264 format:
raspivid -o video.h264
Capture a 10s video:
raspivid -o video.h264 -t 10000
Capture a 10s video in demo mode:
raspivid -o video.h264 -t 10000 -d
To see a list of possible options for running raspivid or raspistill, you can run:
raspivid | less
raspistill | less
Use the arrow keys to scroll and type q to exit.
Extended documentation is available.
Note that we recommend that you change SSH password if you are using a camera, in order to prevent unwanted access.
How to stream video from the Raspberry Pi camera over a network
To view the feed on Linux
Install the dependencies by running the following in a terminal:
sudo apt-get install mplayer netcat
Find your IP address by running ifconfig. (Your IP address will be listed in the console output and will probably be of the form 192.168.1.XXX).
Run the following command in a terminal to view the feed using MPlayer:
nc -l -p 5001 | mplayer -fps 31 -cache 1024 -
To view the feed on Windows
Install and run Linux instead.
Find your IP address by running ipconfig. (Your IP address will be listed in the console output and will probably be of the form 192.168.1.XXX).
Note that your browser may complain that these files are malicious, as they are unsigned executables.
Press the Windows key and the ‘r’ key simultaneously to bring up the “Run” dialog. Enter cmd.exe into the dialog and press enter/return to open a DOS prompt.
Enter the following command at the prompt to view the feed using MPlayer:
[Path to nc.exe]\nc.exe -L -p 5001 | [Path to mplayer.exe]\mplayer.exe -fps 31 -cache 1024 -
To view the feed on OS X
Download MPlayer.
Alternatively, you can download mplayer using Brew, which we recommend.
Find your IP address by running ifconfig. (Your IP address will be listed in the console output and will probably be of the form 192.168.1.XXX).
Run the following command in Terminal to view the feed using MPlayer:
nc -l -p 5001 | mplayer -fps 31 -cache 1024 -
To view the feed on a Raspberry Pi:
Find your IP address by running ifconfig. (Your IP address will be listed in the console output and will probably be of the form 192.168.1.XXX).
Run the following commands in a terminal on the receiving Pi:
mkfifo buffer
nc -p 5001 -l > buffer | /opt/vc/src/hello_pi/hello_video/hello_video.bin buffer
To transmit the feed from the Pi with camera module attached
After setting up the “receiving” machine as per the instructions above, run the following commands in a terminal on the “transmitting” Pi:
raspivid -t 999999 -o – | nc [insert the IP address of the client] 5001
You can then use the commands listed in the “How to use the Raspberry Pi camera software” section above to change the capture time or to add a video effect.
树莓派官网链接:
http://www.raspberrypi.org/camera
http://www.raspberrypi.org/archives/tag/camera-board
http://www.raspberrypi.org/archives/3890
Characters
Properties
- OEM
Non-OEM
- Material
PCB
- Origin
Shenzhen
- Product category
HD camera
Description
以下是详细说明
How to enable camera support in Raspbian
Boot up the Pi and log in. The default username is pi, and the default password is raspberry. (Note: if you have changed these from the default then you will need to supply your own user/password details).
Run the following commands in a terminal to upgrade the Raspberry Pi firmware to the latest version:
sudo apt-get update
Click to enlarge
sudo apt-get upgrade
Click to enlarge
Access the configuration settings for the Pi by running the following command:
sudo raspi-config
Navigate to “camera” and select “enable”.
Click to enlarge
Click to enlarge
Select “Finish” and reboot.
Click to enlarge
How to use the Raspberry Pi camera software
raspivid is a command line application that allows you to capture video with the camera module, while the applicationraspistill allows you to capture images.
-o or –output specifies the output filename and -t or –timeout specifies the amount of time that the preview will be displayed in milliseconds. Note that this set to 5s by default and that raspistill will capture the final frame of the preview period.
-d or –demo runs the demo mode that will cycle through the various image effects that are available.
Example commands
Capture an image in jpeg format:
raspistill -o image.jpg
Capture a 5s video in h264 format:
raspivid -o video.h264
Capture a 10s video:
raspivid -o video.h264 -t 10000
Capture a 10s video in demo mode:
raspivid -o video.h264 -t 10000 -d
To see a list of possible options for running raspivid or raspistill, you can run:
raspivid | less
raspistill | less
Use the arrow keys to scroll and type q to exit.
Extended documentation is available.
Note that we recommend that you change SSH password if you are using a camera, in order to prevent unwanted access.
How to stream video from the Raspberry Pi camera over a network
To view the feed on Linux
Install the dependencies by running the following in a terminal:
sudo apt-get install mplayer netcat
Find your IP address by running ifconfig. (Your IP address will be listed in the console output and will probably be of the form 192.168.1.XXX).
Run the following command in a terminal to view the feed using MPlayer:
nc -l -p 5001 | mplayer -fps 31 -cache 1024 -
To view the feed on Windows
Install and run Linux instead.
Find your IP address by running ipconfig. (Your IP address will be listed in the console output and will probably be of the form 192.168.1.XXX).
Note that your browser may complain that these files are malicious, as they are unsigned executables.
Press the Windows key and the ‘r’ key simultaneously to bring up the “Run” dialog. Enter cmd.exe into the dialog and press enter/return to open a DOS prompt.
Enter the following command at the prompt to view the feed using MPlayer:
[Path to nc.exe]\nc.exe -L -p 5001 | [Path to mplayer.exe]\mplayer.exe -fps 31 -cache 1024 -
To view the feed on OS X
Download MPlayer.
Alternatively, you can download mplayer using Brew, which we recommend.
Find your IP address by running ifconfig. (Your IP address will be listed in the console output and will probably be of the form 192.168.1.XXX).
Run the following command in Terminal to view the feed using MPlayer:
nc -l -p 5001 | mplayer -fps 31 -cache 1024 -
To view the feed on a Raspberry Pi:
Find your IP address by running ifconfig. (Your IP address will be listed in the console output and will probably be of the form 192.168.1.XXX).
Run the following commands in a terminal on the receiving Pi:
mkfifo buffer
nc -p 5001 -l > buffer | /opt/vc/src/hello_pi/hello_video/hello_video.bin buffer
To transmit the feed from the Pi with camera module attached
After setting up the “receiving” machine as per the instructions above, run the following commands in a terminal on the “transmitting” Pi:
raspivid -t 999999 -o – | nc [insert the IP address of the client] 5001
You can then use the commands listed in the “How to use the Raspberry Pi camera software” section above to change the capture time or to add a video effect.
树莓派官网链接:
http://www.raspberrypi.org/camera
http://www.raspberrypi.org/archives/tag/camera-board
http://www.raspberrypi.org/archives/3890