GoBozor ga xush kelibsiz


4K HDMI 3x3 многоэкранный процессор для сращивания телевизоров поддерживает двухмашинный каскад 3x4/4x3/4x4
Price section
dan boshlab
0 so'm
Kafolatlangan yetkazib berish muddati
Agar biz 45 kun kechiksak, buyurtmani bepul olasiz. Batafsil
Har doim siz bilan aloqada
Biz har kuni savollarga har qanday savollarga javob beramiz.
To'lovni qulay usulda xavfsiz qiling
Biz to'lovlarni turli xil usullarda qabul qilamiz.
Bo'lib to'lash mavjud
Mahsulot haqida
Xususiyatlar
- Мощность
12 В1А
- Пункт Нет.
NK-330
Tavsif
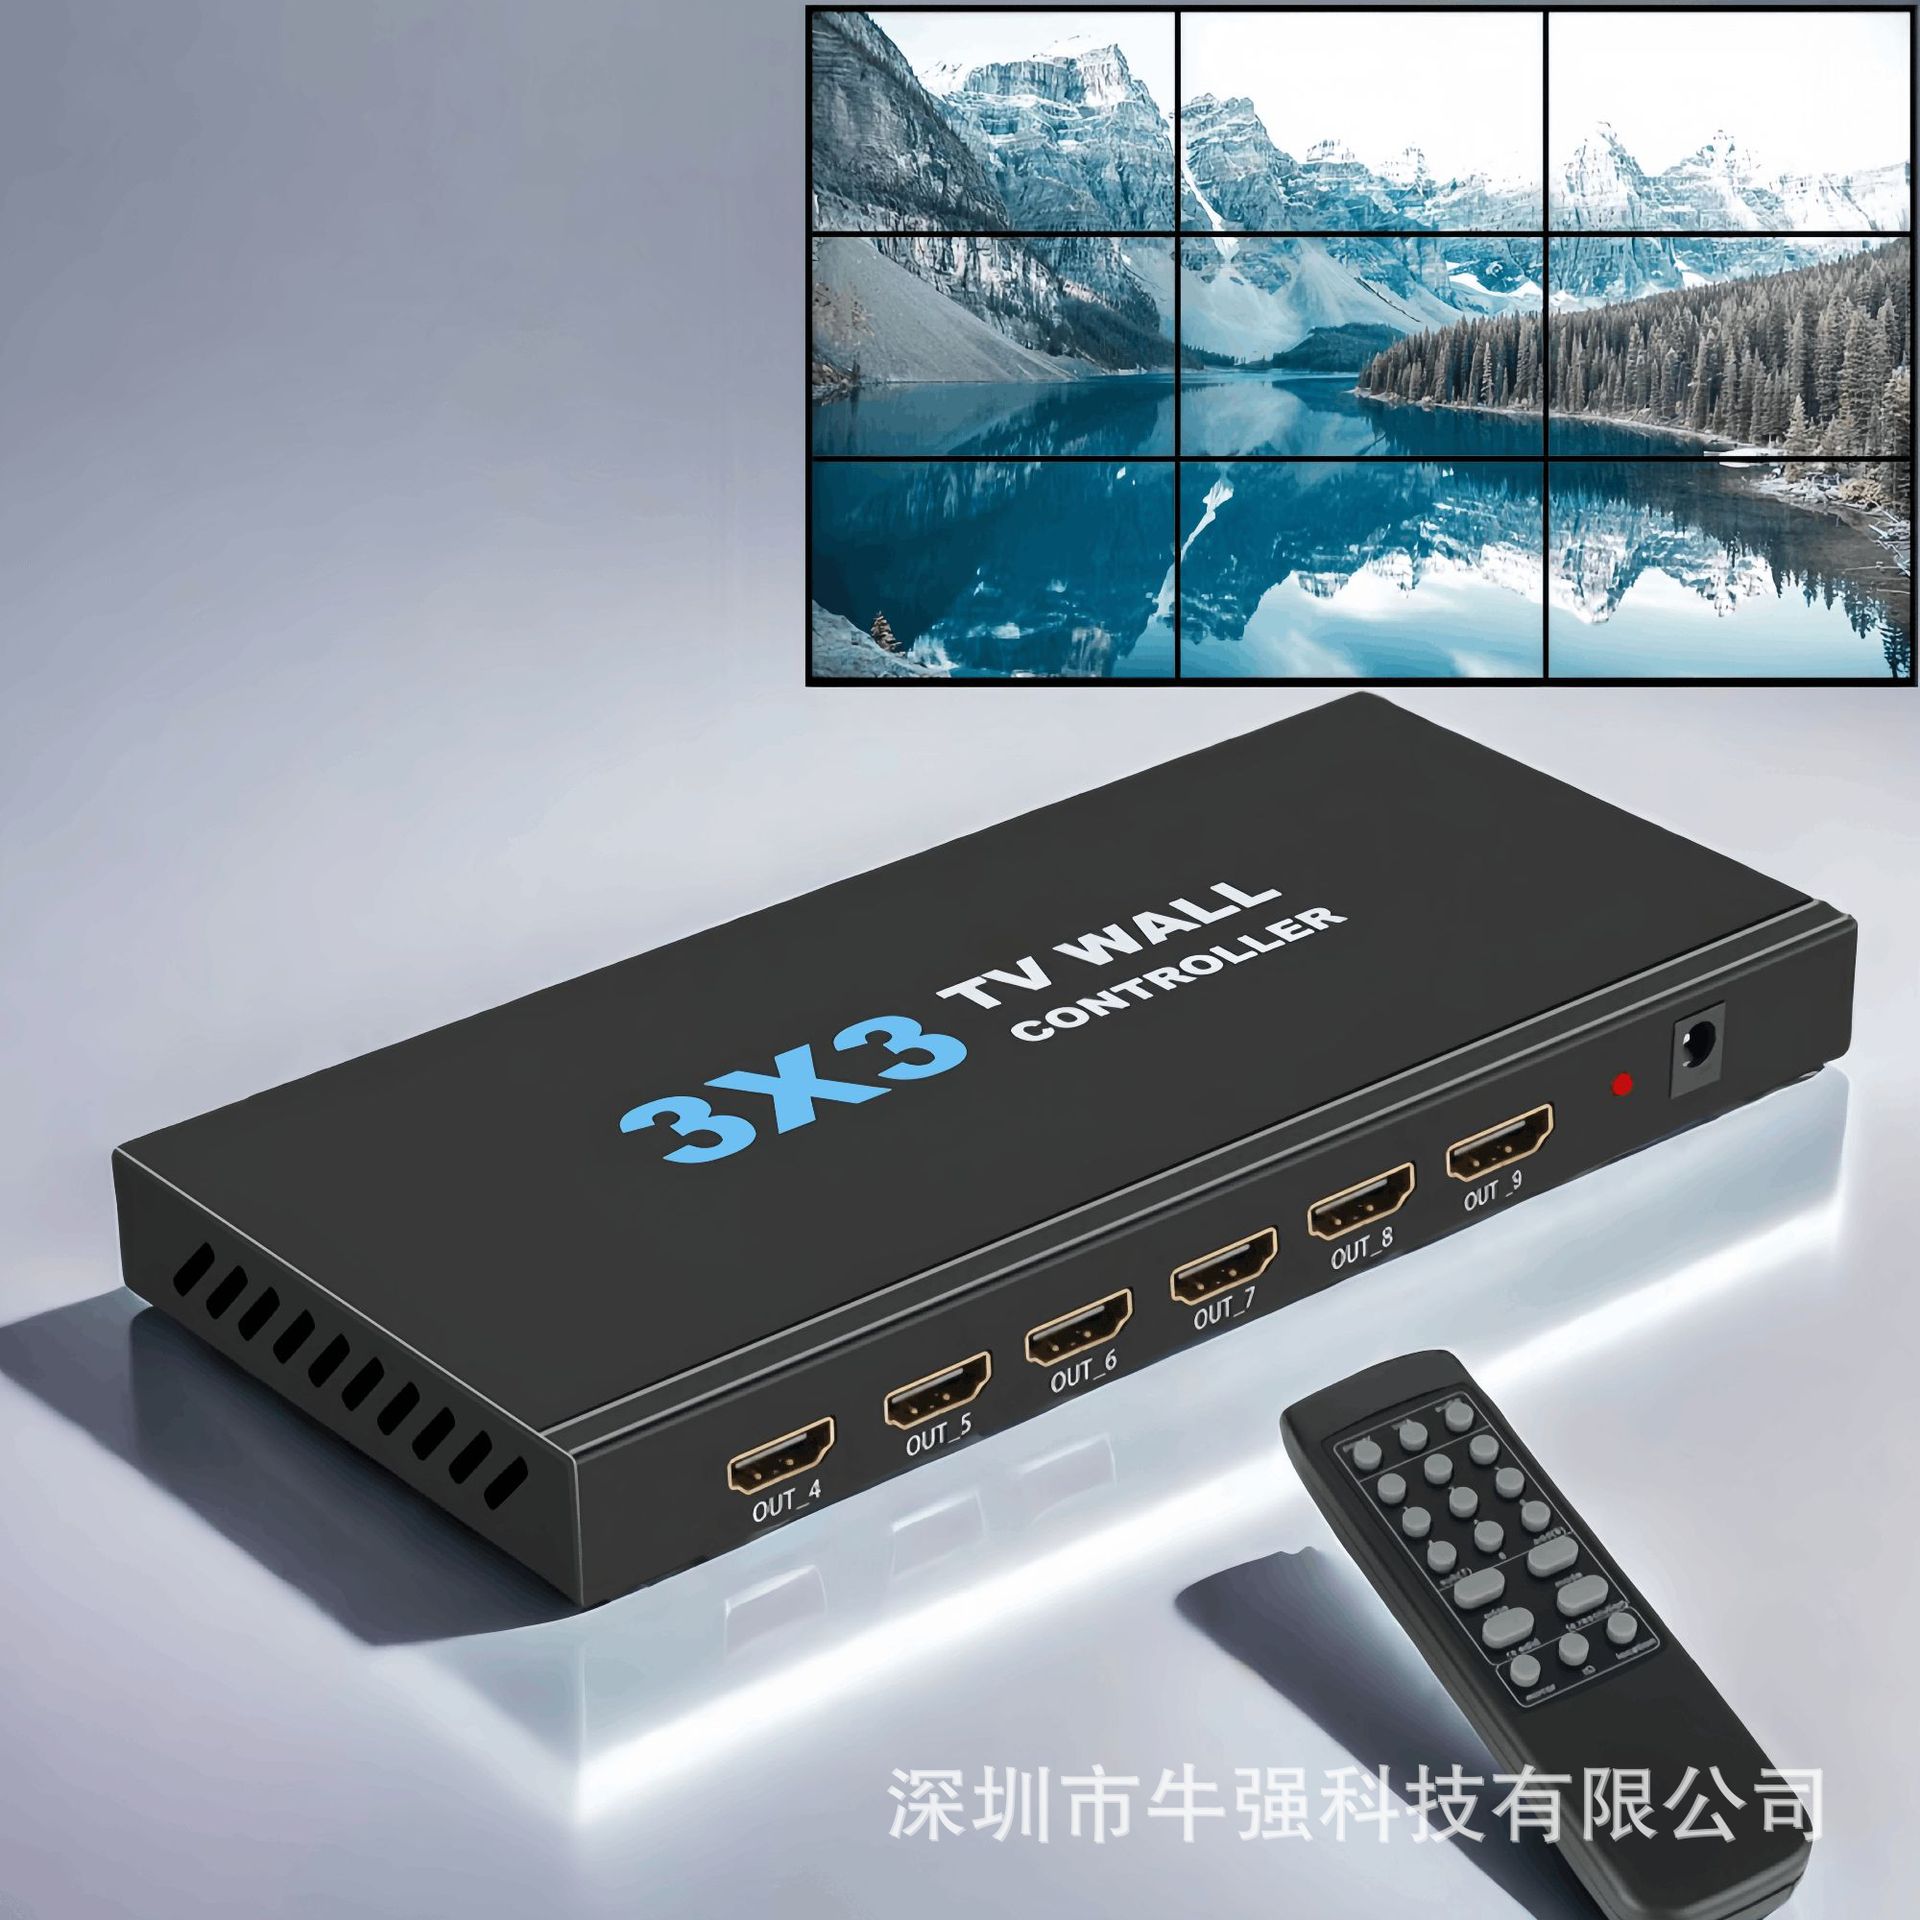
HD 3x3 TV WALL CONTROLLER 4K
Introduction:
This 3X3 Splicer supports 1 HD input and 9 HD output. The main function of the Splicer is to divide a full HD image into 9 blocks and distribute them to 9 video displays, complete with 9 HD HD video display units to form a large dynamic image screen. Supports multiple splicing modes, supports cascading.

Features
* 9-way HD output
* 3840x2160P30HZ input and output are compatible
* multiple splicing support, easy operation, Plug and play
* support 2 machine sub-cascade
Physical interface diagram

OUT_4~OUT_9 → Output HD signals 4 through 9
DC12V → 12V power input port

MODE → Switch between different splicing modes TX → Switch between different output resolutions IR → Receiving remote control signal INPUT → Signal source access LOOP → Signal Ring exit, Cascade interface Audio → Output fiber digital audio OUT_1~OUT_3 → Output HD signals 1 through 3
Package accessories
1、3x3 Splicer-------------------- X1
2、Power Adapter------------------------- X1
3、user manual------------------- X1
4、remote control---------------------- X1
Operation Special Note (very important) :
1.HD cable must use 19 + 1 full needle of wire.
2.The use of image flipping (each image can be flipped independently) :
Step 1, press the remote control“Mirror” button, wait for the OSD in the upper left corner of the image to display“Mirror”; Step 2, use the number button to operate, for example, you want to flip the sixth screen, you press the number“6” button. When you're done, remember to press the“Mirror” button again to exit the operation.
3.Switch the output port screen: first, press the remote control“Location” button, wait for the OSD in the upper left corner of the screen to show“Location”; second, use the digital keys to operate, for example, you want to select the 6th screen output, you press the number“6” button. When you're done, remember to press the“Location” button again to exit the operation.
4.when two machines cascade, pay attention to the following points:
(1)the machine connected to the signal source is set to ID1, the operation steps: the remote control is aimed at the remote control receiving position of this machine (the machine is printed on the“IR” position) , first press the“ID” button, release, then press the number“1” button, at this time, OSD display“ID1”, the operation was successful;
(2)another machine set to ID2, operation Steps: the remote control at the receiving position of the remote control of this machine (the machine is printed on the“IR” part) , first press the“ID” button, release, then press the number“2” button, at this time, OSD display“ID2”, Operation Success;
(3) key lock“Lock” use: if you want to operate the ID1 machine, must first ID2 machine lock. The operation mode is to use the remote control to aim at the remote control receiving position of ID2(the machine is printed on the“IR” part) , press“Lock”, at this point all ID2 machine output screen in the upper left OSD display will appear a lock lock icon, the operation was successful. If you want to operate the ID2 machine, you must first lock the ID1 machine, the same operation.
Remote controller

(1)power: Power on key
(2)lock: Keypad Lock Switch
(3)audio: Mute/non-mute toggle buttons
(4)Number Keys: switch to different modes:
1:1x1 mode;
2:2X2 mode;
3:3X3 mode;
4: looping in {3x4,4x3,4x4} mode;
5: switching to 1x2 mode or 2x1 mode;
6: switching to 1x3 mode or 3x1 mode;
7(sub) : switch to 1x4 mode or 4x1 mode;
8: switch to 2x3 mode or 3x2 mode;
9(add) : switch to 2x4 mode or 4x2 mode;
(5)edge: Edge adjustment function, with keys sub and add
(6)mode: mode is looped in {1x1,1x2,2x1,1x3,3x1,2x2,1x4,4x1,2x3,3x2,2x4,4x2,3x3,3x4,4x3,4x4}
(7) rx edid: Screen Input Resolution Switch
(8) tx resolution: Screen Output Resolution Switch
(9)mirror: Image Flips: Loop-toggle at { up and down, left and right, up and down, left and right ]
(10) ID: set the box ID to work with numeric keys 1-3
(11)location: Output Port Screen Switch, with the number of keys 1 ~ 9 use
Barcha xususiyatlar
Xususiyatlari
- Мощность
12 В1А
- Пункт Нет.
NK-330
Tavsif
HD 3x3 TV WALL CONTROLLER 4K
Introduction:
This 3X3 Splicer supports 1 HD input and 9 HD output. The main function of the Splicer is to divide a full HD image into 9 blocks and distribute them to 9 video displays, complete with 9 HD HD video display units to form a large dynamic image screen. Supports multiple splicing modes, supports cascading.
Features
* 9-way HD output
* 3840x2160P30HZ input and output are compatible
* multiple splicing support, easy operation, Plug and play
* support 2 machine sub-cascade
Physical interface diagram
OUT_4~OUT_9 → Output HD signals 4 through 9
DC12V → 12V power input port
MODE → Switch between different splicing modes TX → Switch between different output resolutions IR → Receiving remote control signal INPUT → Signal source access LOOP → Signal Ring exit, Cascade interface Audio → Output fiber digital audio OUT_1~OUT_3 → Output HD signals 1 through 3
Package accessories
1、3x3 Splicer-------------------- X1
2、Power Adapter------------------------- X1
3、user manual------------------- X1
4、remote control---------------------- X1
Operation Special Note (very important) :
1.HD cable must use 19 + 1 full needle of wire.
2.The use of image flipping (each image can be flipped independently) :
Step 1, press the remote control“Mirror” button, wait for the OSD in the upper left corner of the image to display“Mirror”; Step 2, use the number button to operate, for example, you want to flip the sixth screen, you press the number“6” button. When you're done, remember to press the“Mirror” button again to exit the operation.
3.Switch the output port screen: first, press the remote control“Location” button, wait for the OSD in the upper left corner of the screen to show“Location”; second, use the digital keys to operate, for example, you want to select the 6th screen output, you press the number“6” button. When you're done, remember to press the“Location” button again to exit the operation.
4.when two machines cascade, pay attention to the following points:
(1)the machine connected to the signal source is set to ID1, the operation steps: the remote control is aimed at the remote control receiving position of this machine (the machine is printed on the“IR” position) , first press the“ID” button, release, then press the number“1” button, at this time, OSD display“ID1”, the operation was successful;
(2)another machine set to ID2, operation Steps: the remote control at the receiving position of the remote control of this machine (the machine is printed on the“IR” part) , first press the“ID” button, release, then press the number“2” button, at this time, OSD display“ID2”, Operation Success;
(3) key lock“Lock” use: if you want to operate the ID1 machine, must first ID2 machine lock. The operation mode is to use the remote control to aim at the remote control receiving position of ID2(the machine is printed on the“IR” part) , press“Lock”, at this point all ID2 machine output screen in the upper left OSD display will appear a lock lock icon, the operation was successful. If you want to operate the ID2 machine, you must first lock the ID1 machine, the same operation.
Remote controller
(1)power: Power on key
(2)lock: Keypad Lock Switch
(3)audio: Mute/non-mute toggle buttons
(4)Number Keys: switch to different modes:
1:1x1 mode;
2:2X2 mode;
3:3X3 mode;
4: looping in {3x4,4x3,4x4} mode;
5: switching to 1x2 mode or 2x1 mode;
6: switching to 1x3 mode or 3x1 mode;
7(sub) : switch to 1x4 mode or 4x1 mode;
8: switch to 2x3 mode or 3x2 mode;
9(add) : switch to 2x4 mode or 4x2 mode;
(5)edge: Edge adjustment function, with keys sub and add
(6)mode: mode is looped in {1x1,1x2,2x1,1x3,3x1,2x2,1x4,4x1,2x3,3x2,2x4,4x2,3x3,3x4,4x3,4x4}
(7) rx edid: Screen Input Resolution Switch
(8) tx resolution: Screen Output Resolution Switch
(9)mirror: Image Flips: Loop-toggle at { up and down, left and right, up and down, left and right ]
(10) ID: set the box ID to work with numeric keys 1-3
(11)location: Output Port Screen Switch, with the number of keys 1 ~ 9 use